Showing posts with label Yeast. Show all posts
Herbed Focaccia
in Baking, Bread, Yeast, yeast bread on Friday, January 13, 2012

Stories apart, today I want to share the recipe for a focaccia. A simple and easy method,which I have been following successfully at home. Are you intimidated about yeast/yeast breads? If yes, then this is a perfect recipe to start with. You could never go wrong with a Focaccia recipe,like this. I have tried it several times and it always turned out perfect.

The texture is great and the taste is wonderful !

Ingredients:
Lukewarm water- 1 3/4 cups,divided
Sugar- 1 tsp
Active dry yeast- 2 tsp
Bread flour- 3 cups
A P flour- 3/4 cup
Salt- 2 tsp
extra virgin olive oil- 1 Tbsp
For Olive Oil topping:
Warm Olive oil- 3 Tbsp
Optional herbs/spices:(You can combine your favorites)
Freshly ground black pepper - 1/2 tsp
Dried oregano- 2 tsp
Dried basil- 1 tsp
Dried sage
Fresh Rosemary- 2 Tbsp (1 tsp if dried)
Garlic powder- 1 tsp
Method:
1.Take 1/4 cup of lukewarm water and mix yeast and sugar and set aside for a couple of minutes or until its frothy.
2.In the bowl of your electric mixer - mix the flour, and salt together.
3.Add to it a tablespoon of oil and mix again.
4.Start pouring in the rest of the lukewarm water into the dough and start mixing.
5. Follow it with frothy yeast and continue mixing the dough.
6.Slowly add the rest of the water and mix until the dough comes together and leave the sides of the bowl.
7.Continue kneading for 5-6 minutes or until the kneading is done. (you can test this by pushing down the dough with your finer and if it is done, the dough will bounce back).
8.The dough shouldn't be too tight. It is better if it's on the stickier side.
9.Take out the dough from the bowl and make a smooth ball out of it.Spoon over some olive oil to coat the dough ball and the bottom of the bowl.Cover this and keep in a warm place to rise to double. This may take about 1 1/2 to 2 hours.
19.Take out the dough from the bowl and knead on a lightly floured work surface.
20.Prepare a baking pan by greasing and place the dough in it and flatten the dough till it is about an inch thick.
21.Cover it and let it rest for 30-40 minutes.
22.Preheat the oven at 400 degree F.
23.Make the herb oil by warming the oil in a microwave safe bowl/to be on a safer side, keep in a thick bottom pan that is small and warming the oil. If you are using a microwave, be very careful, do not burn yourself or the oil :-) Keep the oil for 15 seconds and check and keep another 15 seconds until it is warm enough.
24.Mix the herbs in the warm oil and mix well.
25.When the dough is ready, risen double, dimple it with your finger tips and brush with this herb oil.
26.Bake on the center rack of the oven for 18-20 minutes or until it is slightly browned on top.
27.Cool on a wire rack before you slice it.
Sending this bread to Yeastspotting.
Notes:
1.You could use any pizza recipe to make this bread.
2.The herb toppings is up to your imagination. You could use any combo of your choice.
3.You could add more olive oil on the top if you wish.
Adapted from : Flavored breads by Mark Miller and Andrew Maclauchlan
and Bread Baker's Apprentice by Peter Reinhart
Contributor: Namitha
Paczki (Pounchki/Punchki)
in Fat Tuesday, Fried snack, Shrove Tueday, Yeast on Wednesday, November 9, 2011

As such, I decided to go with the European tradition on Fat Tuesday this year. With a little snooping around on the web found a recipe for paczki. Simply put, packzki is a polish doughnut. Deep fried with stuffing and dusted with sugar- it's decadent. It is also very filling, but then again that’s the whole point of having this on Shrove Tuesday/Fat Tuesday. The recipe is from here. All I have done is halve the quantity and skip the step of layering and filling before frying.


Ingredients:
Eggs – 3 Whole or 6 egg yolks
Salt – ½ tspn
Dry Yeast – 1/8 ounce (half of a sachet is what I used)
Water – 2 Tbspn
Butter – 1/3 C at room temperature
Sugar – ¼ C
Bread Flour – 2 ¼ C
Brandy or Rum – 8 tspn (I eye-balled about half of 1/3 C)
Whipping Cream – ½ C scalded
Preserve – to fill (I used Smuckers, apricot preserve)
Oil – for deep frying
Method:
1. Beat eggs for about 5 minutes or until frothy. If you are using only egg yolks(which is recommended) beat till it is thick and soft, and set aside
2. Dissolve yeast in luke warm water 110 D C
3. In a separate bowl Cream butter and add sugar gradually and beat until fluffy
4. Using the lowest speed on your egg beater beat in the yeast
5. Add about 1/8th cup of flour into the above mixture
6. Follow up with your choice of rum or brandy and half the cream
7. Beat in ¼ cup of flour
8. Beat in the remaining cream
9. Add ½ of the remaining flour and the egg and beat for 2 minutes
10. By now I changed the blade on my hand mixer to the hook which is used to knead dough
11. Gradually beat in the remaining flour until it comes together as a ball
12. Cover and let it rise. It will take about an hour.
13. When doubled, takes about an hour punch it down, cover and let it rise again
14. After another hour or so, punch down again, and on a floured surface (you will need some flour since the dough is sloppy) use a rolling pin to roll the dough out to about 2 inch thickness
15. Cut using a cookie cutter or glass
16. Deep fry on low medium until both sides are golden brown.
17. Break a punchki and make sure the insides are cooked. This will help to gauge if you have the heat on the right setting.
18. Serve with cream or fruit preserve filling.
Submitted to Yeast Spotting
Contributor: Sunitha
Sweet Pretzels
in Baked Snacks, Baking, Bread, Pretzels, Yeast on Friday, October 28, 2011

This morning when I decided to skip breakfast, I had no clue the thought of saying no to food could trigger a furious desire to eat. In short, I succumbed to my carnal self and baked some spongy pretzels just like the one on the cart I had on a rainy, summer afternoon. Maybe it was not raining, but I am just saying. The whole pretzel experience was so good that my mind has automatically started associating it with my other favorite feature, the rain. Breakfast ended up being quite good this morning. The aroma of baking bread filled the room so much it was almost tangible. It’s pure pleasure to delve into spongy, moist pretzels, and wash it down with a hot cuppa! Now I have enough zing to get out and burn some of it off on the treadmill.

The recipe for the pretzels is from the Swedish Cakes and Cookies book, but I have changed some of their tedious measurements. When I tried to convert the dl to cups, I found they were a little off. Hence, I have made my own corrections, and the pretzels came out well.


Ingredients:
Butter - 7 Tbspn
Milk - 300 ml (1 cup is 250 ml)
Sugar - 1/2 cup
Salt - 1/4 tspn
Active Dry Yeast - 1 Satchel ( 2 1/4 tspn)
All purpose Flour - 3 1/2 cups
Egg - 1 Beaten for brushing
Method:
1. Melt butter on low heat in a sauce pan and add milk when melted and turn off the heat when the mixture is luke warm (115 D F)
2. Add the sugar and yeast and whisk until the yeast is dissolved
3. Add half of the flour and stir with a spatula to combine
4. Add the remaining flour and knead
5. Slide it onto a lightly floured surface, divide the dough into 16 parts
6. Roll each part in the palm of your hand as long as you can and shape into pretzels
7. Make sure there is enough space in between the twist and let is rise for 30 -45 minutes
8. Brush egg and bake in a preheated oven for 5 - 8 minutes or until golden brown on top
Oven Temperature: 475 D F
Convection: 425 D F
Contributor: Sunitha
Peter Reinhart's Buttermilk White Bread

I have tried several bread recipes, some of them are posted on this site. But I have never tried baking white bread, so far. We (my family and I) do not like the usual store-brought white bread. Then again, when you bake them, it is a different story. This is why I started searching for a white bread recipe, and yet not the usual, but something different, something special! Bingo! I found it in the recipe I am sharing with you today. The butter, buttermilk and egg that goes into this recipe gives the bread a die-for-it flavor nobody can resist. I saw this recipe was recommended by many other sites when I decided to give it a go myself. I would not talk about the recipe to you unless everyone in my family loved it. Great recipe!
I made buns using half the dough and they came out great as well !

Serve it with your favorite spread or with soup

Ingredients:
Bread flour- 4 cups +1/4 cup if necessary
Salt- 1 1/2 tsp
Sugar- 3 Tbsp
Active dry yeast- 2 tsp (approx 1 packet)
Butter- 1/4 cup at room temperature
Buttermilk- 1 1/2 cup
Egg,slightly beaten- 1
Method:
1.Stir together the 4 cups of flour,salt,sugar and yeast using a spatula or your mixer.(yes,you don't have to dissolve the yeast in anything)
2.Add the softened butter,buttermilk and lightly beaten egg and mix well, till the dough comes together.
3.Knead well for 6-7 minutes using your kitchenaid.
4.If you are using hands, then transfer the dough onto a floured surface and knead well for at least 10 minutes.(the dough is a little bit on harder side )
5.Spray or coat with oil and cover the dough. Keep in a warm place to rise for about 2 hours or until the dough has doubled in size.
6.Transfer the dough onto a floured surface and divide the dough into 2 equal parts, if you are making bread and cover with a towel and let rest for 20 minutes.(I divided one part into 6 and made some buns too)
7.Divide the dough into 12 equal parts if you are making buns .
8.Shape them and cover with a towel and let rise for about 90 minutes or until doubled.
9.Meanwhile preheat the oven at 350 degree F, if you are making bread,400 for rolls and 450 for buns.
10.Give an egg wash, using an egg beaten lightly with some water or use some milk, just like me, to brush on the top.
11.You could use sesame or poppy seeds to sprinkle on the top.
12.Bake the bread loaves for about 35-40 minutes or until the top turns golden brown.Bake the buns for about 15 minutes
13.Cool on a wire rack.Serve with the spread of your choice
Sending this for Yeastspotting at Wild Yeast
and Foodpaltette series Brown at Torview


Contributor: Namitha
Recipe Courtesy:Mainly from here.But basically it's from The Bread Baker's Apprentice, by Peter Reinhart.
Sun-dried Tomato Bread
Can I tell you how my 2 year old is? Mine has got his motor skills improved and he is running riot in the house. Banging vessels, imitating his sister in everything he says, energetic and active pursuing new all the time. He is a handful. I don't know how but he randomly gets the keys on the the keyboard and the control panel on the screen never in one place. The worst was when he silently crept close to the socket and tried to dig in two plastic bands used for securing packets and wires etc. Of course the sockets are all child protected but his curiosity is something else. If someone asks me to run the marathon now I will win because I literally fly around the house saving a pan that is flying all over the house or rescuing him from that scientific discovery he is intent on making.
He escapes all the time with his charming smile that says I know you don't like me doing this but mom I am just discovering the world. Hope you have some fun today and enjoying yourself even if is just running around the house in your pyjamas with your 2 year old.
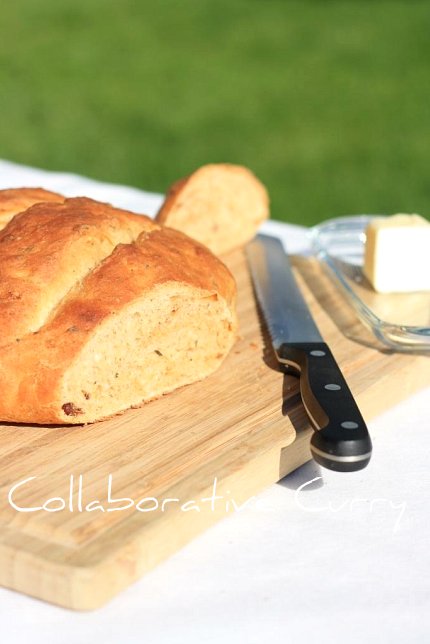
Ingredients :
Bread flour- 4 cups
Yeast- 1 1/2 tsp
Water- 1 1/2 cups
Milk, lukewarm- 2 Tbsp
Basil/Thyme/Rosemary (dried)- 1 Tbsp
Sugar- 1 Tbsp
Salt- 1 tsp
Olive Oil(you could use the same oil from the sun dried tomato bottle)- 1 Tbsp
Sun dried tomato- 1/3 cup

Method:
1.Dissolve the yeast in the lukewarm milk and let it sit for a couple of minutes.
2.Whisk together the flour, salt and sugar in a large mixing bowl.
3.Add the sun dried tomato, basil and mix again.
4.Pour the milk-yeast mixture and slowly add water and mix well.
5.Transfer the dough to a floured surface and knead using your hands. Knead well for 5 minutes.
6.Cover the dough and let it rise in a warm place for 40 minutes.
7..Take out the dough and knead to remove the air formed in.
8.Cover it and keep it back again in the warm place for another 40 minutes.
9.Press and knead the dough again, and divide it into 2. Cover and let it rest on the floured surface for 20 minutes.
10.Shape the dough into 2 rectangles that are about 6 by 8 inches in size.Make sure that the thickness is even in all places.
11.Let it sit covered for the third and last time in the warm place for another 40 minutes.
12.Preheat the oven at 425 degree F.
13.Make scores on the dough using a greased knife or razor blade and bake for 25 minutes or till the top turns a nice brown color and you hear a hollow sound when you knock on the top.
14.Cool on a wire rack.
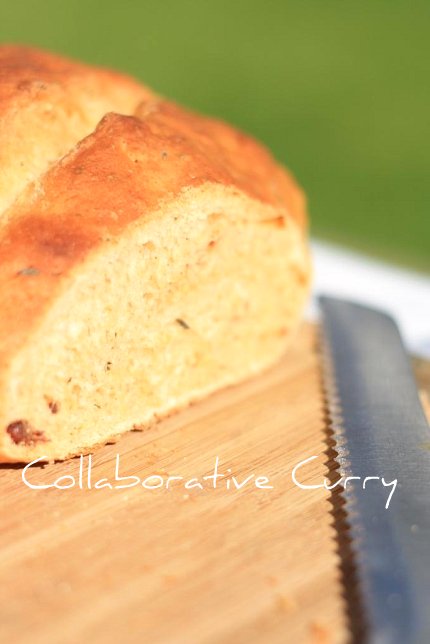
Notes:
1.If you like the tomato flavor on the higher side you could add 1/2 cup sun dried tomato.
2.This is quite time consuming, like any other yeast bread recipe. So you may want to plan in advance.
3.My scores didn't come out perfect :( I need to practice more :-)
Recipe adapted from :Baking at home, CIA
Contributor: Namitha
Cinnamon Rolls-Frosting
Other than eating delicious cinnamon rolls, parenting continues to keep me occupied. That requires all hands on deck, you will agree! Weather wise, aren't the colors of autumn fading away from the scenery? Maybe it's time to bring in some daffodil or hyacinth bulb and start watching them grow and herald spring. Let's try and forget the cold days and jump right on to pleasant thoughts, what do you say? Have a good one!

Here is a glimpse of the cinnamon rolls right out of the oven

We love having them for breakfast, or as a snack with evening tea. It's simply great as a mid day snack with coffee too. Now, you watch out for that waistline, I cannot be blamed for not warning. :)

Ingredients:
Confectioner's sugar- 1 1/2 cup
Milk- ~1/4 cup
Butter- 2 Tbsp
Pure Vanilla extract- 1/2 tsp
Method:
1.Mix everything together well using a hand blender and spoon it onto the cinnamon rolls.(add more milk if the consistency is too thick and a little more sugar if it is too runny)The best way is to add a tablespoon of milk at a time and continue mixing.

Contributor: Namitha
Home made Paav with Paavbhaji masala-The most popular streetfood in India
in Beans, Bell Pepper, Bread, Chaats, North Indian dishes, Snacks, Vegetarian Side Dish, Yeast on Tuesday, October 11, 2011

I have enjoyed street food and am still very fond of them, like you can see. Pav bhaji tops the list. The pani puri, masala pav etc are all equally good and they all bring back a flood of memories. Times with friends. Money was difficult to come by those days but there was always enough for a plate of pav bhaji. Hot off the stove, enjoyed on a cool evening after the nasty heat spell of the day. Wash it down with some sugarcane juice and voila it’s the perfect fix.
For Paavbuns
Follow our recipe here. If you do not have White Lily flour you can also make them with the following differences. When you keep making breads you will discover how to make your own changes. We wanted to tell you this so that you may dare to experiment and come out with successful results every time you make bread. Please feel free to ask us in case of questions.
Tips:
1.All purpose flour and bread flour in 1:1 ratio.
2. More water, and less milk, making the final water content the same.
3.When you reduce the fat content you can use less yeast, say for ~7 cups of flour ,I only used 2 packets of yeast. ( yes I made a bigger batch this time !)

For Paavbhaji masala :
Ingredients:
Onion- 1
Garlic crushed- 5-6cloves
Tomato- 1
oil-2 tbsp
Frozen green peas- 1/2 cup
Bellpepper(finely chopped)-2 tbsp
Potato- 1
Cabbage- 1 small piece
Cauliflower florets- 1/3 cup
Beans- 4-5
Carrot- 1 small
Paavbhaji masala- 2 tbsp
Red chilli powder- 2 tsp/acc to your spice level
Butter- 2-3 Tbsp
Criander leaves- for garnishing
Lemon wedges-for serving
Finely chopped onions-For serving
Method:
1.Coarsely chop all the veggies except green peas and bell pepper and cook them in a pressure cooker with a little water and salt.If you are planning to cook on steam then chop them finely.
2.Heat oil in a pan and saute the finely chopped onions.
3.When it starts turning golden brown,throw in the crushed garlic and saute till the raw smell leaves.
4.Now add the chopped tomatoes and saute till the oil starts leaving the sides of the pan.
5.throw in the green peas and chopped bellpepper into this and saute well.
6.Add the masala powder and chilli powder and stir till the raw smell leaves.
7.When the veggies are cooked mash them well and pour it into the masala mixture.
8.Stir well and add little more water if required.
9.Boil this and cook for 8-10 minutes on low heat.
10.Add the butter and stir well.
11.Serve warm with sprinkles coriander leaves on top.
12.It is bettr tokeep the pan on a low-heated stove while you serve it with hot paav buns.
13.heat a pan and apply butter, keep the paav buns, that is cut into halves with cut ends facing the pan. Take out and serve warm with the paavbhaji masala.
14.usually we also serve some chopped onions and lemon wedges sprinkled with chopped coriander leaves with the masala.

Contributor : Namitha
Italian Breadsticks/Grissini
The Italian bread sticks (aka Grissini) originated in Turin, Italy according to Wikipedia. They are usually served as an appetizer in restaurants. I don't mind them having any time , either as a snack, or with a cup of coffee.
I didn't have the patience to make them into perfect ropes, but they still look pretty !

They could be served as an appetizer with a soup of your choice or enjoy them with a cuppa/ as it is :-)

Here is a glimpse from my kitchen.Hope this gives you an idea about rolling, cutting and making the sticks !

Ingredients:
All purpose Flour- 2 to 21/4 cups
Salt- 11/2 tsp
Olive oil- 2 Tbsp
Active Dry yeast- 2 1/4 tsp/one packet
Sugar- 1 Tbsp(divided)
Mixed dried Herbs(I used a mixture of oregano, marjarom, basil and parsley)- 2 tsp
Milk- 1/2 cup + 1 Tbsp for brushing
Warm water- 1/4 cup
Method:
1.Mix half of the sugar and yeast in the warm water and let it sit for a couple of minutes.
2.In a large mixing bowl, combine flour(start with 2 cups),salt,rest of the sugar,dried herbs and olive oil.
3.Make a well in the middle and add the milk and the yeast mixture.Mix everything well.
4.Knead the dough for a few minutes using your stand mixer or hands.Add more flour,if necessary to make a smooth dough.
5.After kneading for another 4-5 minutes, shape the dough into a ball,cover and keep it for an hour in a warm place so that it will double in size.
6.After the dough becomes double,divide the dough into 4 equal parts.
7.Preheat the oven at 425 degree F. Prepare a baking sheet lined with parchment paper that is slightly greased.
8.Roll out each part of the dough into a 12 inch long and 4-5 inch wide rectangle.
9.Divide this rectangle into 4 equal parts and roll up it lengthwise to make a stick.
10.Keep it on the greased parchment paper and let sit covered for 10-15 minutes. Brush with milk or with slightly beaten egg.
11.Bake for about 15 minutes or until it starts turning golden brown.
12.Cool on a wire rack and enjoy with a cuppa.

Notes:
1.Instead of adding the dried herbs in the dough, you could use them to make a topping for this bread sticks.After brushing with milk just sprinkle them on top.
2.You could also use sesame seeds to sprinkle on top.
3.The egg wash gives a nicer and better color for the bread sticks, but I prefer to use milk/oil.
4.This makes 16 bread sticks.
Inspired by: Home made breads by Better Homes and Gardens, 1960 edition
Contributor: Namitha
Bun
in Baking, Bread, Kerala, Kerala Dishes, Yeast on Thursday, September 22, 2011

Another favorite way to enjoy your evening is with black coffee and bun (a.k.a. rolls). This combination is sometimes thought of as a quick fix or fast snack for an evening. Grab a dozen or half of them from the bakeries and the family enjoys it with a sugary black coffee. I remember my grandmother adding some ghee (clarified butter) on top of the coffee.
Todays recipe is one of these rich rolls closely resembling the buns we get to buy in the bakeries. I remember walking past bakeries in the evening around 2.30 or 3.00 P.M and the aroma of fresh baked bread permeating the dusty roads luring the passerby. Most people give in and you will see mothers returning from office work, children, fathers, uncles and aunts or some others who make a short walk to the bakeries closest to their homes to pack away a few. The bakery goods come packed in little brown bags and I can so clearly remember them sitting on counter tops with the brown bags now dappled with the fat from whatever is inside.
There are a lot of things we can do with this same recipe as given below like make potato bun or khari bun (khari meaning spicy). Either ways, if you are bun fan like me and enjoy it dipped in black coffee, tea or soup or just cut them and spread some jam or butter, todays recipe will make you content. Its soft, rich and tasty. If you do two proofings like I have mentioned you can get quite a light airy texture.
Enjoy the experience of kneading the dough and baking these yummy buns. Let me know if you have any questions regarding the recipe or way I made it. I used Lily's light bleached flour for this batch of buns.
Ingredients:
Flour – 4 -5 cups
Dry yeast - 2 packages (1 package is 2 1/4 tsp)
Milk – 1 ½ cups 2% reduced fat milk
Water – ¼ cup
Vegetable oil - ½ cup
Granulated sugar – ¼ cup
Salt - 1 tspn

Method:
1. Mix ¼ cup warm water, 1/2 tspn sugar and the yeast. Make sure the temperature of water is not more than 110 D F. Let it rest for 5-10 minutes and make sure it froths before you use. This is the test to make sure you have active yeast
2. Mix together milk, oil, sugar and salt in a large bowl in which you can knead your dough. Make sure everything is at room temperature. If you are taking milk out of the refrigerator warm in microwave making sure its not too hot or it will kill the yeast.
3. Add a cup of flour and mix and the frothy yeast
4. Stirring to mix the ingredients keep adding the flour a cup at a time till you have added all 4 cups
5. If the flour is gooey and you are unable to knead with your hand add some a couple of spoons of flour at a time
6. Flour your counter top or a clean surface where you can knead your dough
7. Drop your dough on the floured surface and incorporate the flour slowly into the dough kneading well
8. Kneading will make your dough to come together. If you find the dough sticky and not manageable its ok that’s how the bread dough is.
9. The reason for asking to add dough post 4 cups is because the lesser you can add flour and get a soft dough the tastier, fluffy rolls you make
10. Test to make sure your dough is done by indenting impressions using your index finger and middle finger. If the indentation stays your dough is kneaded well
11. Take a good look at the size of your dough and leave to rise for an hour
12. Test the dough to make sure It has risen by touching it lightly on the surface. If your finger impression stays then you know it has.
13. Punch down the dough when fully risen and take the dough in your hand and slowly round it to look like a mushroom. Smooth top and the dough tucked under.
14. Leave it to rise once more around 20 minutes or until dough has doubled in size
15. You May punch down the dough at this time and round it or cut it using a knife and shape to desired shape. Round rolls or hot dog buns. Lay it on a greased cookie sheet or tray and leave it covered to double around 20 minutes
16. Bake in a 400D F preheated oven for 10 to 15 minutes

Notes:
Never add more flour than is called for
Beat an egg and once you have shaped the dough brush it on top (egg wash)
If you do not eat eggs you may brush it with milk or olive oil
To get a nice thin and shiny crust spread butter on the top while the rolls are still hot, fresh from the oven
Croissants

This is kind of my first attempt at taking step by step pictures. I cannot say I enjoyed this much, but hopefully it is helpful to understand the cutting and rolling of croissants. There is spoon filling at the broad end of the triangle; roll-tucking in the center, while simultaneously keeping the tapered-end stretched. This helps, give several layers as possible for the finished croissants.

To make chocolate filled pastry, cut the dough in rectangles and roll

Let it sit for about 10 minutes so that the dough rises a little, give an egg wash and sprinkle with sesame seeds if you like. Do not leave pineapple pieces on the baking sheet while baking (like you see in the picture) because this might burn while in the oven. I sprinkled some while photographing for effect, though, I doubt that was very successful.

Aha! baked goodies, crisp on the outside with buttery layers inside.

Enjoy for breakfast with milk, or every time you spot them on your counter top, grab one and pop'em in your mouth like I do. No wonder the needle on my weighing scale keeps tipping to the wrong side.
Ingredients:
For the Dough:
All purpose flour bleached and enriched - 2 1/4 to begin. )Keep plenty in store because you will need to work the dough while rolling)
Water - 3/4 cup
Eggs - 1 (beat and divide in two )
Yeast - 1 1/4 tspn
Salt - 1/2 tspn
Sugar - 2 1/2 Tspn
Butter - 1 1/2 stick (divide into six parts)
Filling:
1. I use cheese, jalapeno, chocolate and even pineapples. You can use filling of your choice.
I have used chocolate chips, if you have small stick that will work better while rolling
For the pineapple filling I have used canned pineapple chopped fine and sprinkled with sugar
Method:
1. Mix yeast, 1/2 tspn sugar in 1/4 cup of luke warm water (110D F) and wait till the yeast froths
2. Take all the dry ingredients together in a bowl and make a well in the center
3. Add 1/2 the egg,( and retain the remaining for egg wash), water and yeast and using a spatula mix
4. Leave the dough in the refrigerator for 15 mintues
5. Dust your counter top with dough and drop the sticky dough in.
6. Knead the dough to make it supple and roll out into a rectangle
7. Spread one part of the butter and fold like a book. (Check this video for more help)
8. Wrap in cling film and refrigerate for 15 minutes
9. Continue rolling out the dough in rectangle, spreading butter and folding like a book until you exhaust the butter. This makes sure you have incorporated the butter evenly and have flaky layers
10. You may refrigerate the dough overnight and bake them the next day or after resting 15 minutes
11. Roll, cut, shape croissants and give an egg wash as mentioned earlier and bake at 400 D F for 10 - 15 minutes
Contributor: Sunitha
Calzone
in Baking, Bell Pepper, Bread, Chicken, Continental, Non Vegetarian main course, Yeast on Thursday, September 15, 2011
We enjoyed this as an evening snack yesterday, but it was quite filling. So much so that we didn't eat any dinner. Therefore, enjoy it as a one pot meal or snack but either ways you will not be disappointed. It's delicious.
On a different note:
Today is festive because of a pretty little girl,
she was born on this day a few years back.
Her stories and spirit she lends this blog.
She is Nami's daughter, I wish her a very happy birthday!
M- God Bless!

Pizza Base:
I have used the recipe from our blog given here. This will make 8 Calzones.
1. Leave the pizza dough to rise to double in size, approximately 2 hours and go on to make the filling

Filling:
Chicken Breast - 1 big
Onion - 1 medium size
Tomato - 1
Garlic - 4 cloves
Peas - 1/2 cup
Capsicum - 1/4 to 1/2
Green Chilis - 3 nos (optional)
Seasoning - a generous dash
( Mrs. Dash Extra spicy seasoning)
Antipasto - 1/2 cup (this was a mixture of cured artichoke, black and green olives and bell pepper)
Olive Oil - 1 Tbspn
Cheese - 1/2 cup (mix of parmesan, Asiago and Romano)
Egg white - of 1 egg

Method:
1. Clean and chop chicken into tiny pieces
2. Heat oil in a pan and add chopped onions and saute, followed by garlic
3. Once the onions have become translucent add the chicken pieces and saute till it turns white
4. Add chopped tomato, seasoning, peas and salt about 1/4 tspn and saute
5. Keep the vessel covered and cook for 10 minutes or until chicken has cooked through
6. Add the capsicum stir in and cook for a minute and add the antipasto and stir in and remove from heat
Preparing Calzone
1. Once the dough rises, which takes about 2 hours, punch it down and divide into 8 equal parts
2. Roll each part into discs as much as you can roll out. About 1/4-1/2 inch thickness
3. Spoon in the filling, sprinkle over 1 Tbspn of cheese on one half of the disc.
4. Lightly apply water to the edge of the disc
5. Lift the other half over to cover the filling and edges of the disc meet. With a fork seal the calzone
6. Beat an egg white and using a pasty brush do an egg wash over the calzone
7. Bake in a pre heated over for 360 D F for 10 minutes or until the calzone is golden brown on top
Serve with marinara sauce as dinner or enjoy like you would a savory snack.
Contributor: Sunitha
Popular entries
-
 The Tupperware Jel-Ring is an old classic and still today, it is very popular with my Tupperware customers. I must admit, its also one of my...
 -
 I had soya chunks/nuggets in my hostel canteen,when I was studying in Trichy. We get mixed vegetable kurma with soya chunks in it. My f...
 -
Only two days for the New Year to come,and at this point I am very happy to announce you that I am hosting an event for the ...
-
How is it going? For me, it has been quite a busy day chatting up with my family and friends. Nevertheless I spun a very tasty, to...
-
 Ahem. Please take note: I am throwing a healthy dinner into the mix of Super Bowl snacks and Valentine Day sweets. Have I mentioned I am st...
 -
 Evidently, according to Ceci Snyder of the National Pork Board , their slogan “the other white meat” is getting a little boring and “just...
 -
 This is a great recipe by Tupperware that utilizes the Tupperware Oval Microwave Cooker. This recipe will make 6 servings. Rotisserie Chicke...
 -
 I wanted to try instant oats idly for a long time. I used to make a version of this before,by adding a oats as major part in the rav...
 -
The spicy curry cooking on the stove and a cloudy weather outside is just what I need on a lazy day like today. With this kind of weathe...


 Posts
Posts

