Showing posts with label Vegetarian Side Dish. Show all posts
Thaalu Thoran/Taro Stem Sauteed with coconut and spices
in Authentic, Coconut, Colocasia, Grandma's, Kerala Dishes, Naadan, Taro Stem, Vegetarian Side Dish on Sunday, April 22, 2012
Everyone at home know how much I like this one. Not so easily available in the US my sweetest granny made sure I had enough. She made up for all the missed times. Oh! she is quite old now and she spoils me.
Back to the recipe. It is quite simple. Though rare you can buy the stems in Chinese super markets in the US. Exorbitantly priced when the urge hits I indulge. This used to happen especially when I was carrying my son. Now, you will agree those are times when you can just let go. I have to say this in closing you need no excuses to spend on this one. Once you taste it I guarantee you will go back for more thaalu.

Ingredients:
Stem of colocasia/Taro/thaalu- 4
Cocnut grated- 1/3 cup
Green Chillies- 2-3
Turmeric powder- a pinch
Salt
For seasoning:
Raw rice- 3 Tbsp
Mustard seeds- 1/4 tsp
Coconut oil/Any cooking oil- 1 Tbsp
Shallots- 2-3,chopped finely
Curry leaves- 1 sprig
Dried red chillies- 2

Method:
1.Chop the stem finely into slender pieces.Sprinkle a few tablespoons of water and salt over it and squeeze out this completely to remove the juices from the stem that cause itching.This also keeps the thoran dry and crisp rather than mushy.(You could apply some cooking oil on both your palms,or wear some disposable gloves so that it will not make you itchy !)
2.Heat the oil in a pan and do the seasoning starting with mustard seeds.Once they splutter add the rice into it and let it brown slightly. Trow in the shallots and red chillies and saute for a couple of minutes or until the shallots turn brown.Now saute the curry leaves too
3.Meanwhile grind the coconut and green chillies coarsely.
4.Throw in the chopped stem and coconut mixture along with turmeric and salt into the seasoning and cover to cook on low heat. Stir every 2-3 minutes until it is cooked. This won't take more than 5-6 minutes.
5.Keep the pan open and let all the moisture get absorbed.Serve warm with pulissery or sambar .

These pictures of Taro is from my father's vegetable garden.As a child (and also now) I love to see the water droplets on a taro leaf :-)
Contributor: Namitha
Chembu Varutharacha Kari
in Coconut, Taro, Vegetarian Side Dish on Thursday, April 19, 2012
I am sure you have had a variation or maybe even the same curry before. It will be interesting to hear from you and know what you call it. Tart and spicy it goes well with rice. I am thinking it won't be too bad with rotis either. Give it a go and tell me how you like it.

Ingredients:
Chembu/Taro - 5 nos
To Fry:
Onion - 1 small size
Coconut - 1/2 cup
Chili powder - 1/2 tbspn
Coriander Powder - 1 Tbspn
Turmeric Powder - 1/2 tspn
Oil - 1 tspn
Tamarind - lime sized ball soaked in a cup of water
For Tempering:
Mustard - 1/2 tspn
Shallots - 1 big or 2 small
Red Whole chilies - 2 broken in pieces
Pepper corns - 4
Curry Leaves - 1 sprig
Oil - 1 Tbspn

Method:
1. Pressure cook the chembu, skin on and some salt. Peel once cooked and set aside. It takes about 3 whistles on medium flame in a pressure cooker.
Grinding:
1. Heat oil and fry the chopped onions till translucent
2. Add the coconut and fry till you get the fried coconut aroma. Wait till the color changes from white to light golden hue
3. Add in the three powders and stir cooking the powder and you the raw smell of the ingredients changes to a cooked aroma of the coconut and spice mix
4. Set aside and once it cools some add some water and grind it to a fine paste.
Combine:
1. Take the juice of the soaked tamarind using your fingers and throw away the fiber.
2. Add another cup of water and bring the tamarind juice to a boil in a gravy pot and add the cooked chembu and check for salt.
3. I let this mix boil hoping to let this root get some of the salt and tart taste
4. Finally add the ground gravy and let the curry boil and mix
5. Add the tempering and serve

The reddish brown pot you see in the above picture is 'chatti' the earthen pot used in a lot of cooking in Kerala. When cooked in this over a log fire and coconut oil wherever you are in the world you can taste a little Kerala.
The pot is courtesy a very dear friend. She packed it to the US from Kerala and then had it transported from Chicago to Ohio just for me. It will be cheap to just say thank you because the gesture is priceless. Love you J for who you are and for being so thoughtful and kind! Need to also thank another friend who helped bring this from Chicago. I will write all about it when I can get a better decent picture of the chatti and thavi. Love it!
Contributor: Sunitha
Kale Saute
in East meets West, Easy Peasy, Fusion Food, Kale, Vegetarian Side Dish on Wednesday, March 28, 2012

Kale - 1 Bunch
Green Chili - 3
Onions - 1/4
Garlic - 2 cloves
Soya Bean Sauce - sprinkle
Oil - 1/2 Tbspn
Salt - to taste

1. Tear the leaves off from the stem
2. Heat a tablespoon of oil and once heated add chopped onions and garlic and follow it with the leaves
3. Stir well add some soya bean sauce. I sprinkled some on maybe about a tspn
4. Close and cook on low fire and stirring in between till done. Check for salt and sprinkle some if needed
Notes:
The leaf is quite chewy and the flavor has a bite to it which I quite liked. I am sure we could make an Indian style thoran and it will be quite tasty too.
Contributor: Sunitha
Tri Delight
in Beans, Carrots, Easy Peasy, Mixture of Vegetables, Potato, Vegetarian Side Dish on Thursday, March 1, 2012

Ingredients:
Beans - 30 nos
Potato - 2 medium size
Carrots - 2 medium size
Dry Red chili - 5 nos
Garlic - 5 pods
Black pepper - to taste
Salt - to taste
Oil - 1 Tbspn
Water - 1/3rd cup

Method:
1. Heat oil in a pan and add the crushed garlic and red chili and saute for a minute or two till both express cooked aroma
2. Add in all the vegetables sliced small in equal shapes as much as possible
3. Saute a while and add 1/3 cup of water, salt and on a low flame cook till the potato is done
4. Once the potato is done without breaking them stir and add crushed black pepper if you need the saute to be more fiery to taste

Notes: Serve them with rotis or rice.
2. You could avoid the water and saute in only the oil by stirring. This takes more time and patience but quite tasty
3. If you are not adding water you might need a little more oil
4. You may also add a shallot and curry leaves when you saute the red chili and garlic.
Contributor: Sunitha
Rasam
in To make Sadya, Vegetarian Side Dish on Saturday, January 14, 2012

Ingredients:
Tomato (on the vine kind) - 2 medium
Shallots chopped - 1 Tbspn
Garlic - 6-8 cloves (plump)
Curry Leaves - 1 spring
Dry red chilies - 5
Green chilies - 2 (optional)Jeera - 1/4 tspn
Mustard - 1/2 tspn
Asafoetida - 1/4 tspn
Methi powder - 1/4 tspn
Turmeric - 1/2 tspn
Coriander Powder - 1/2 tspn
Pepper powder - 1 tspn
Marble size tamarind
Water - 5 cups
Salt - 1 1/2 tspn table salt (Please use your judgment when adding salt)
Oil - 1 Tbspn

Method:
1. Crush the chopped tomatoes with your hand or a spoon. This can be coarse not a paste
2. Soak the tamarind in about a cup of water
3. Heat oil in a pan and add mustard and jeera
4. Once the mustard splutters add shallots, green chilies, red chilies and curry leaves and saute
5. When your onions are translucent add the garlic and saute
6. Follow up with all the powders and saute adding the tomato without burning the powders
7. Stir for a minute and add 4 cups of water
8. Mix the tamarind water with your hand making sure you have extracted the tamarind and its mixed in the water
9. Bring the whole mixture to a boil add about a handful of chopped coriander leaves.
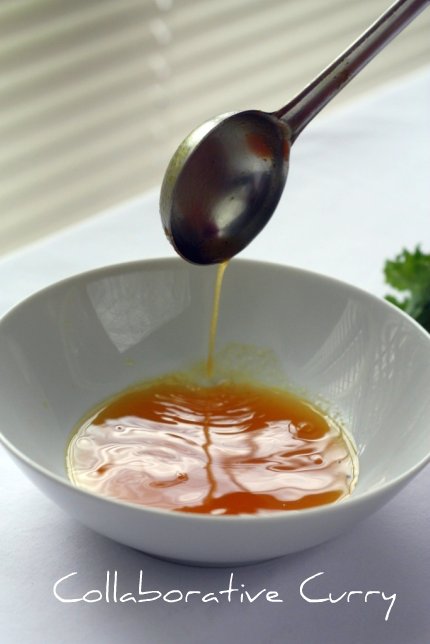
Notes:
1. The taste as I have mentioned is when you just bring the rasam to a boil and not over do it.
Contributor: Sunitha
Mampazha Pachadi/ Mango in mustard-coconut gravy
in Kerala Dishes, To make Sadya, Vegetarian Side Dish on Friday, January 13, 2012
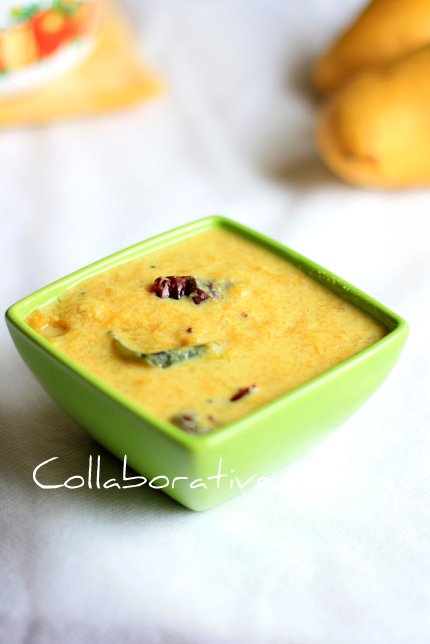
Ingredients:
Ripe Mango- 1
Green chilles- 1 or 2
Turmeric Powder- a pinch
Grated coconut- 3 Tbsp
Cumin seeds- 1/3 tsp
Mustard seeds- 1/2 tsp
Grated jaggery- 1 Tbsp/ to your taste
Yogurt- 1/4 cup
For seasoning:
Coconut oil- 2 tsp
Mustard seeds- 1/4 tsp
Red chillies- 2
Curry leaves- a sprig
Method:
1.Peel off the skin and cut the mango into big pieces.You could add the seed too into the pachadi.
2.Cook the mango along with enough water,green chillies,turmeric and salt.When it is almost cooked add the jaggery and cook for another 5 minutes.Mash them well.
3.Grind together the coconut and cumin to a fine paste with as little water as possible.
4.Grind the mustard seeds coarsely, preferably using a mortar and pestle.
5.Heat the oil in a pan.Splutter the mustard seeds and saute the red chillies and curry leaves,coarsely ground mustard seeds, then the ground coconut paste.Saute till all the water is absorbed.
6.Spoon out this into the mango mixture and cook for 3-4 minutes, switch off the heat.
7.Blend the yogurt with a spoon and add it to the mango coconut mix and mix well.Serve with rice and other side dishes.
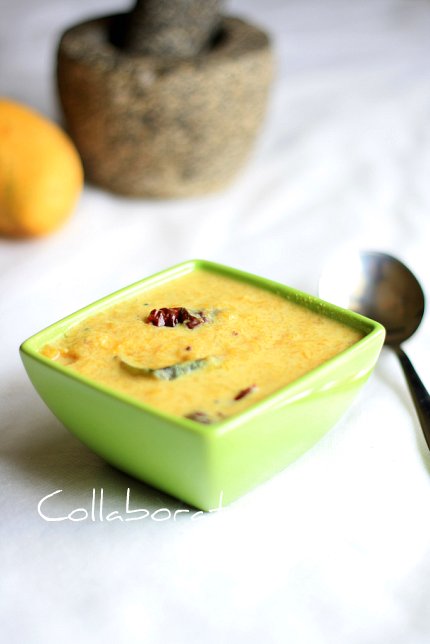
Notes;
1.Normally in Kerala we use the local variety called "nattumanga" for preparations like this and the mango has its own specific flavor.You won't be able to replicate it with store bought mangoes ,but when you have no other choice like me, you could try this.
2.If you are using the above mentioned mango, then just peel off the skin using your hands and add the skin and the seed that has flesh on it for making pachadi/ pulissery.
3.You could add sugar instead of jaggery if you do not have jaggery, but the flavor from the jaggery makes this pachadi perfect .
Contributor: Namitha
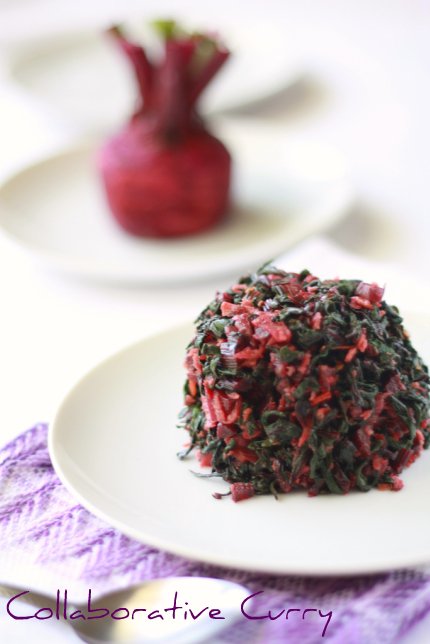
Beet Leaves Sauteed
in Vegetarian Side Dish on Tuesday, January 10, 2012

Beets Leaf - 1 Bunch
Coconut - 1/4 cup
Shallots - 2 nos
Green Chilies - 4
Mustard - 1/4 tspn
Curry Leaves - 1 sprig
Turmeric - 1/4 tspn
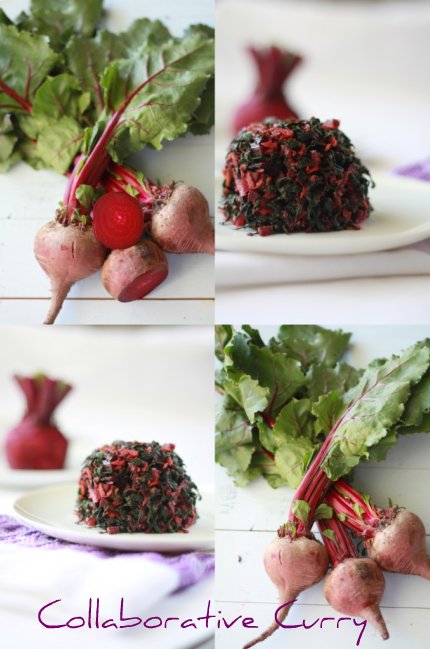
1. Add a tablespoon of oil and crackle the mustard
2. Add the coconut, shallots and green chilies thinly sliced together with the turmeric
3. Add the chopped leaves and open cook till done
Manga Chammanthi/ Mango Chutney
in Chutney, Coconut, Kerala Dishes, Vegetarian Side Dish on Saturday, January 7, 2012

Ingredients:
Mango slices- 2-3 (2 by 4 inch pieces,preferably the flesh, closest to the seed)
Coconut grated- 1/3 cup
Green chillies- 2 or 3
Shallot- 1
Curry leaves- 2
Salt- to taste
Method:
1.Peel off the skin from mango slices.
2.Grind everything together in the small bowl of a mixie/ on the "ammikkallu" without adding any water.
3.If you are grinding using an "ammikkallu"/arakallu grind the coconut and mango first followed by green chillies, shallot and salt. Finally grind everything together/mix together.
4.Serve with rice,thoran and curd/yogurt.Believe me,if you haven't tried this one yet, it tastes divine :-)
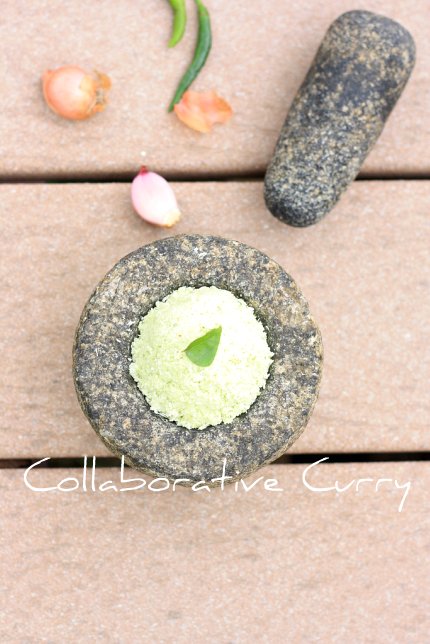
1.I did grind this in a mixie, the presentation is just for the camera ;-)
2.You could add more or less mango slices, according to your sourness level.
Sending this to "Green Gourmet event" hosted by Preeti of Write food.Happy hosting, such a cool event Preeti :-)

Contributor: Namitha
Drumstick in thick coconut gravy
in coconut gravy, Drumsticks, mild but packed with flavor, Vegetarian Side Dish on Friday, January 6, 2012


Did you know that the drumstick tree is said to be one of the most useful trees on earth? Surprised? Me too! Wikipedia says “It is considered one of the world’s most useful trees, as almost every part of the Moringa tree can be used for food or has some other beneficial property.” This is phenomenal. So, let’s not waste any more time, but jump straight in- to learning how to cook this vegetable.

This curry is generally made with drumsticks and mango, where mango gives the tartness. I did not have any handy, so decided to make it without, and what do you know – not bad! Obviously the tartness is missing, but the addition of jeera, and a generous amount of cloves, packs the curry with enough flavor. A mango pickle to go with it will be perfect.

Ingredients:
Drumsticks – 14, 2-inch pieces
Thai Green Chilies – 4
Turmeric – 1/2 tspn
Chili Powder - 1/2 tspn
For Grinding
Coconut – 1 cup
Jeera – 1 tspn
Garlic Cloves - 4
Tempering
Coconut oil – 2 Tbspn
Shallots – 3
Curry Leaves – 1 sprig
Dry red chilies – 2 broken into 4 pieces
Method:
1. Cook drumsticks in 1 cup or enough water to immerse them together with turmeric, ¼ tspn salt and green chilies. Cooked to done but not falling apart. That will be about 10 minutes. Note that I have used frozen drumsticks.
2. Grind coconut, jeera and garlic cloves to a fine paste, and add to the cooked drumsticks. Use water to make a thin or thick gravy to your preference. Take the pan off the heat as soon as the curry heats through. Check for salt and add to taste.
3. Heat coconut oil in a small pan splutter the mustard. Follow it with shallots, red chilies, and curry leaves, and pour over the curry.
Serves: 4
Serve with rice.
Rajma
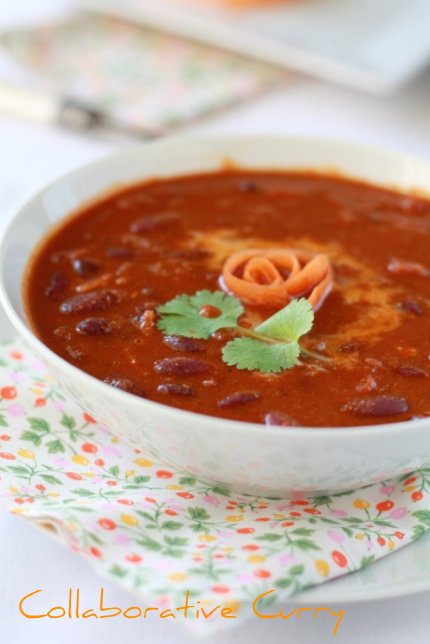
1. Rajma - 1 cup (soak overnight)
2. Onions - 2 cups finely chopped
3. Tomato - 2 nos finely chopped (best when blanched and pureed)
4. Ginger - 2 tspn finely chopped
5. Garlic - 2 tspn finely chopped
6. Coriander powder - 3/4 Tbspn
7. Chili Powder - 1/2 Tbspn
8. Turmeric Powder - 1/4 tspn
9. Cummin Powder - 1/2 tspn
10. Garam Masala - 1 tspn
11. Pepper - 1/4 tspn
12. Nutmeg Powder - 1/4 tspn
13. Shahi Jeera (Black Cummin) - 1/4 tspn (I took whole and then crushed them)
14. Canola Oil - 2 Tbspn
15. Coriander Leaves for garnishing optional

Method:
1. Soak a cup of rajma overnight. Clean and pressure cook in a cup of water and 1/4 tspn salt
2. Heat oil in a pan saute onions till translucent
3. Add chopped ginger and garlic and saute till the onions are golden brown
4. Add all the powders either mixed together in a little water to make a paste or as is. (Mixing in water to make a paste helps to prevent the powders from being burned off). I crushed shahi jeera and added along with the nutmeg and garam masala
5. Saute till oil leaves the pan.
6. Add chopped tomatoes (if its not pureed then the skin may float so be sure to either chop them fine or use pureed tomato or canned puree) If canned puree, about 2 Tbspn will suffice
7. Saute well and add the cooked rajma
8. Take a heavy ladle or round bottomed big spoon and mash about 1/4 of the rajma. I like to do this to thicken the gravy as well as blend in the taste
9. Be sure not to mash too many of the rajma the nice blend a little mashed and some whole enhances taste and appearance
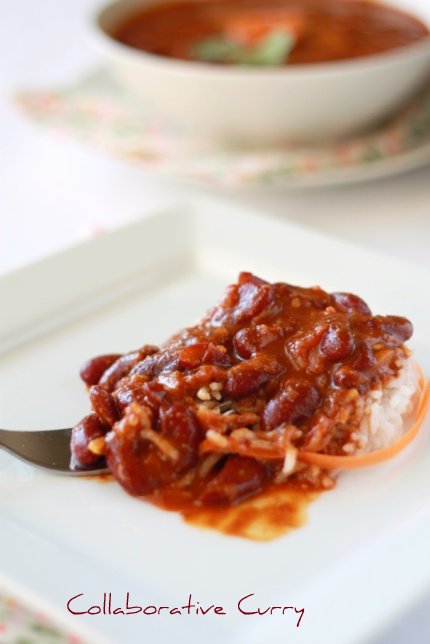
1. You could add a dollop of fresh cream and chopped cilantro as garnish
2. Addition butter about a Tbspn before taking the curry off the stove butter blends into soothing and taking the curry a notch above the ordinary.
3. Serve with rotis or rice
Contributor: Sunitha
Celery stir fry with coconut/ Celery Thoran
in Vegetarian Side Dish on Wednesday, January 4, 2012
I stir fried celery for lunch. I never thought it will taste good as a thoran. Celery always brings to mind a strong flavor which goes with Chinese and Continental cooking and I never imagined it to adapt to the Indian cuisine. When my friend mentioned how they had celery thoran I twisted my lips and made an ugly face, thank god I was on the phone and she didn't see me do that. I was intrigued nevertheless. But not enough to try it instantly. After a year since that conversation, this morning I tried. Seeing I had piled up celery which were expediently bought for the purpose of making Chinese stir fry, I decided to give thoran a go. What do you know, it was pretty good. I cannot talk flowery language on how ground breaking the taste is but it definitely works well as a thoran. I am enjoying this new addition to my repertoire of thoran. Celery. You will enjoy it too.
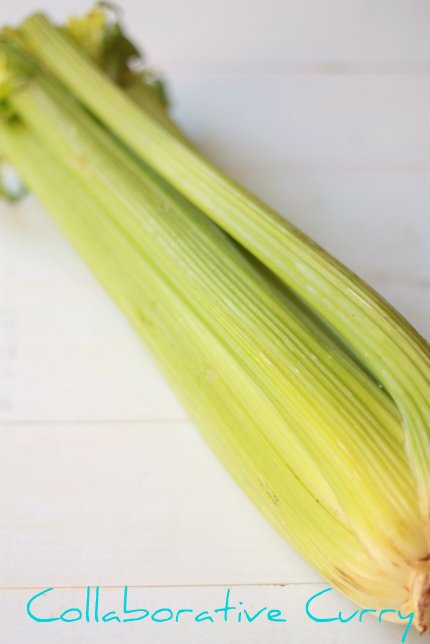
1. Celery - 5-6 stocks (I measured out 3 cups chopped)
2. Onions - 3 Tbspn finely chopped
3. Garlic - 1 Clove finely chopped
4. Green Chilies - 3 nos finely chopped
5. Mustard - 1/4 tspn
6. Turmeric - 1/4 tspn
7. Coconut - 1/4 cup
8. Canola Oil - 1 Tbspn
9. Salt - a little less than 1/4 tspn (or to taste) table salt
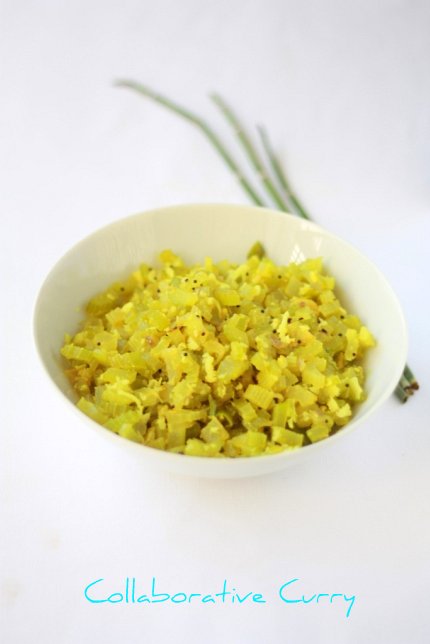
Method:
1. Heat oil in a wok or shallow wide pan and slip in the mustard
2. Once the mustard pops add the chopped onions, garlic and green chilies and saute
3. Follow up with chopped celery and turmeric powder and stir in
4. Add the grated coconut and salt stir to mix well
5. Close with a lid and on low to medium fire or heat cook
6. Celery should express water which aids the cooking but be sure to stir to avoid burning
7. Once cooked which will be in 5 - 6 minutes serve with rotis or rice.

Contributor: Sunitha
Chakkakkuru-Manga Curry/ Jackfruit Seeds and Raw Mango Curry
in Coconut, Jackfruit, Kerala Dishes, Mango, Vegetarian Side Dish on Tuesday, January 3, 2012
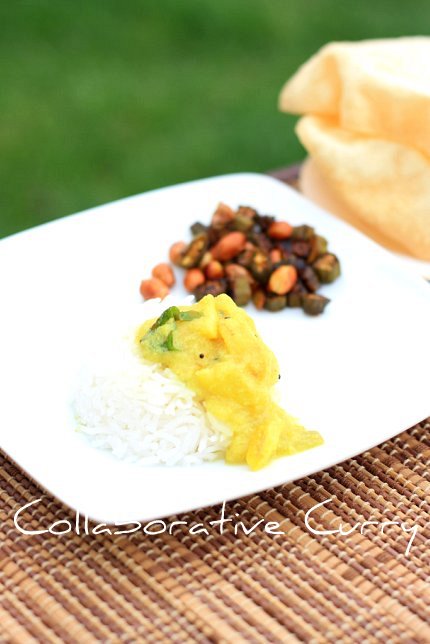
Ingredients:
Raw Mango slices- 1/2 cup (3/4th of a mango)
Jackfruit seeds- 10-12
Turmeric powder- 1/4 tsp
Coconut grated- 3-4 Tbsp
Cumin seeds(jeera)- 1/4 tsp
Green chillies- 2
Shallot- 1
For seasoning:
Coconut/ any cooking oil- 2 tsp
Mustard seeds- 1/4 tsp
Red chillies- 2
Curry leaves- 1 sprig
Method:
1.Slice the mango after removing the skin. Cut each jackfruit seed into 4 pieces.
2.Cook the Mango slices and jack fruit seeds together after adding some salt and turmeric and water in a pressure cooker.
3.Grind together the grated coconut, cumin, green chillies and shallot together.
4.Mix this with the cooked veggies and cover and cook again for 3-4 minutes.
5.In a small pan do the seasoning(heat the oil,splutter the mustard seeds and throw in the red chillies and curry leaves and saute) and pour over the curry. Mix and serve with rice.

Notes:
1.You may want to add or reduce the number of mango slices,depending on its sourness level.Mine was medium sour.
2.If the mango slices are not mashed even after the seeds are cooked, mash them gently.
3.This is not recommended for people who have gastritis problems
I won a giveaway by Gina of Simply life and see what I got. A package of POPCHIPS which had all the 6 flavors, 4 packets each. We all loved it and thanks again Gina :-)

Contributor: Namitha
Achinga Payar Mezhukkupuratti / Yard long Bean stir fried with Thai Chili
in Kerala Dishes, To make Sadya, Vegetarian Side Dish, Yard Long beans on Friday, December 30, 2011


Beans - 1/2 a bunch (about 30)
Thai chili - 6 nos
Oil - 2 Tbspn
Salt - to taste
Method:
1. Snap the beans to small pieces and split the chilies at the ends
2. Heat oil in a pan add the beans stirring intermittently on medium heat saute the beans
3. When half done add salt to taste and stir
4. Cook till done and serve with rice and curry

Mampazha Pulissery/Mango in yogurt coconut gravy
in Kerala Dishes, Mango, Pulissery, To make Sadya, Vegetarian Side Dish on Tuesday, December 27, 2011
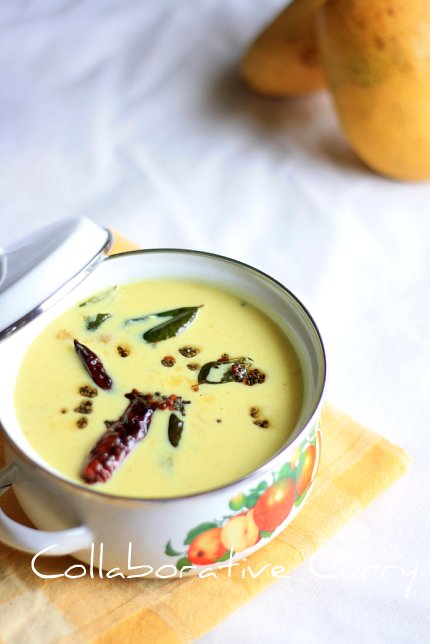
Ingredients:
Ripe Mango- 1
Yogurt- 1 Cup
Coconut grated - 3 Tbsp
Cumin seeds - 1/4 tsp
Green chillies- 2
Red chilli powder- a pinch
Turmeric powder- 1/4 tsp
Salt
For seasoning:
Mustard seeds- 1/4 tsp
Fenugrek seeds- 1/4 tsp
Red chillies- 2
Curry leaves -a sprig
Method:
1.Peel and cube the mango and cook them in enough water to immerse them completely after adding turmeric,green chillies,red chilli powder and salt.Cook for 10-12 minutes.
2.Grind the coconut and cumin seeds together to a fine paste.
3.Mix this paste in the cooked mango mix and cook covered for another 3-4 minutes.
4.Meanwhile blend the curd or yogurt using a whisk or hand mixer.
5.Add this into the mixture slowly while stirring with one hand.Adjust the consistency using water.
6.Stir continuously,and when you see the steam starts coming switch off the heat and pour into the serving dish.(This shouldn't take more than 3-4 minutes.If you keep longer it will get curdled)
7.Heat oil in a pan and do the seasoning.(when mustard seeds splutter, add fenugreek seeds, wait for that to splutter and reduce the heat, add red chillies and curry leaves)
8.Pour this seasoning over the pulissery and serve with Rice.

Contributor: Namitha
Artichoke
in Vegetarian Side Dish on Monday, December 26, 2011

It is rather simple once you know how to go about it. The taste is difficult to explain, but similar to somewhere around the area of peas, avocado, etc. I think. A rich vegetable protein is the best I can do. You can read about artichokes in wikipedia here

It is described as a perennial thistle, and I couldn't help but smile. My second year in Tennessee, a friend and I drove down to Mississippi on the Natchez Trace. Fantastic times! Both of us being wild flower enthusiasts, we closely looked out for them, and sighed 'oohs and aahs' at every spotting - including dandelions and thistles too. My friend, Marilyn, would forgive me liking dandelions, but when it came to thistles I had something else coming. The minute I started photographing them, she would say with fervor - repeatedly, constantly "it is a weed, a farmer's nightmare!" Otherwise excited about stopping for pictures - if my target were thistles, she would not be budged. Apparently, in her gardening days, she said she had ghastly experiences trying to weed these, and she hated it with passion. It is kind of a joke between us - how I like thistles, and how she hates them. She now sends me birthday cards with thistle pictures on it :)

Therefore from thistles to artichokes, it's a love that cannot be explained. I love the way they look. I guess it's time to send Marilyn a card picturing an artichoke!
Ingredients:
Artichoke – 2
Bay Leaf – 1
Garlic – 2- 3 pods
Lemon – 1
Salt – to taste
Method:
1. Chop off the pointed end of artichoke globe and rub lemon juice to avoid blackening while you work on the scales
2. Snip off the pointed edge of each scale and boil it in enough water with bay leaf, garlic, lemon juice and salt
3. Once cooked you can eat the fleshy end of each leaf/scale. When you get to the heart of the globe, the base is covered with hairy choke which should be spooned off before you enjoy the fleshy base.
4. You can dip it in mayonnaise and enjoy.
5. It took me about 45 minutes to cook.
Bittergourd/Pavakka Kichadi
in Bitter Gourd/Pavakka, Kerala Dishes, Pachadi/Kichadi, To make Sadya, Vegetarian Side Dish on Wednesday, December 21, 2011

Ingredients:
Bitter Gourd- 1
Green chillies- 1 or 2
Coconut Grated- 3Tbsp
Cumin seeds- 1/4 tsp
Mustard seeds- 1/4 tsp
Yogurt- 1/4 cup
Oil-for frying
For seasoning:
Coconut oil- 1Tbsp
Mustard seeds- 1/4 tsp
Red chillies -2
Curry leaves- a sprig
Method:
1.Chop the bittergourd and green chillies thin and fine.
2.Heat oil for frying and fry the bitter gourd and chillies till they become crisp, but not overdone.Keep this aside
3.Grind the coconut and cumin together to a fine paste.Crush the mustard seeds.
4.Heat oil in a pan and do the seasoning.Add the coconut mixture and crushed mustards and saute till all the water is absorbed.
5.Take the fried bittergourd in a mixing bowl and crush them a bit.To this add the sauteed coconut mix and yogurt and mix well.
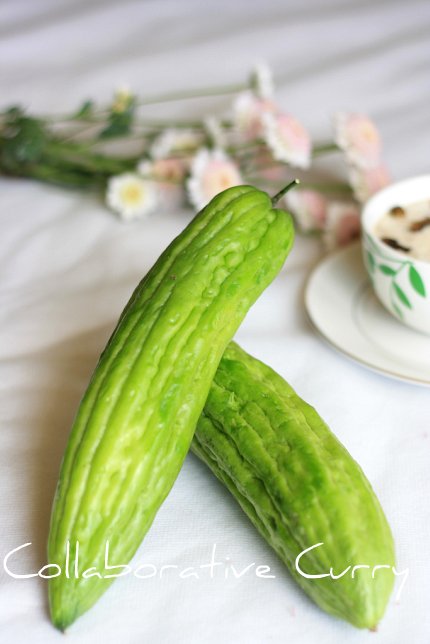
Notes:
I used Japanese Bitter melon for this. As I have mentioned in the Bitter gourd fry post, it's less bitter than the dark green variety.There were many requests for a picture of that and here it is :-)
Kaplanga Erissery/Papaya with coconut and green chillies
in Kerala, Kerala Dishes, To make Sadya, Vegetarian Side Dish on Sunday, December 18, 2011
My father is an exceptionally good cook considering in his days it was not common for a man to even help in the kitchen. Territories were definitely marked during his times and the kitchen was not a man's forte. My Father was truly an exception being liberal in his thoughts. He loved to cook and helped my mom in the kitchen every opportunity he had. When I think about it, it was only fair since my mother was employed too.

Today’s recipe is my Dad's. When it comes to festive dishes or sometimes even the day to day dishes, my father is a better cook in our family. However, my mom would have a hard time cleaning the mess after him, but the food always paid off for the trouble she would say. If you could get my father to say “your dish is fine,” that means “it is fantastic.” Surely, a man of few words it is difficult to get more than that from my Father. I remember eagerly waiting when I started cooking, as a teenager, for a compliment from my Dad. If he even said “its fine” it was enough to make my day. Like I said, he is a man of few words and I knew he was a good cook so any positive comment even a nod was likes receiving an award of accomplishment.
So, here is a recipe from a great food critic and cook, my father :-)
Ingredients:
Papaya(started to ripen) cut into 1 inch cubes- 2 Cups
Turmeric powder- 1/4Tsp
Salt- To taste
For Grinding:
Coconut(grated)-1/4 cup
Cumin seeds-1/2 Tsp
Shallots-1 big
Green chillies-4-5
For seasoning:
Coconut oil/cooking oil-1 Tbsp
Mustard seeds-1/2 Tsp
Coconut(grated)-2Tbsp
Red chillies-2-3
Curry leaves-1Sprig

Method:
1.Pressure cook the papaya cubes along with turmeric and salt (for 2 whistles- or till it gets cooked really well)
2.Grind the things listed under the label (don't have to grind it smooth)
3.Mash the papaya well and add the coconut mixture into it.
4.Cover and cook for a few minutes on medium heat.
5.Switch off the heat.
6.Heat oil in a pan to do the seasoning.
7.Splutter the mustard seeds and a throw in the red chillies.
8.To this add the grated coconut and fry it till the coconut start turning golden brown color.
9Trow in the curry leaves and saute till you get the golden color for coconut flakes .
10.Mix it into the erissery and serve with rice,yogurt and thoran of your choice.

Notes;
1.it's best when you use the half ripened papaya.But still you could make it with raw ones too.(Have done it many times like that )
2.Just like any other erissery you can add a lentil, preferably soaked red beans along with papaya while cooking.
3.As I have told any erissery, thought it will be nice to share some more erissery ideas to those who are new to this dish. Instead of papaya, add pumpkin, raw banana, elephant foot yam etc for this dish.
4.This erissery is less problematic for the people who have gastritis problems.
Contributor: Namitha
Beetroot n' Carrot Stir fry/Mezhukkupuratti
in Kerala, Kerala Dishes, To make Sadya, Vegetarian Side Dish on Friday, December 16, 2011

Ingredients
Carrot (long thin slices)- 1 1/2 cup
Beetroot(long thin slices)-1 cup
Green chillies (slit into 2)-2-3
Salt-to taste
Cooking Oil-2 Tbsp

Method
1.Heat oil in a pan.
2.Throw in the vegetable slices along with chillies and salt.
3.Cover and cook till the vegetables get tender.
4.Let it get fried keeping the lid open
5.Serve with rice and Sambar .

Contributor: Namitha
Popular entries
-
 The Tupperware Jel-Ring is an old classic and still today, it is very popular with my Tupperware customers. I must admit, its also one of my...
-
 I had soya chunks/nuggets in my hostel canteen,when I was studying in Trichy. We get mixed vegetable kurma with soya chunks in it. My f...
-
Only two days for the New Year to come,and at this point I am very happy to announce you that I am hosting an event for the ...
-
 Ahem. Please take note: I am throwing a healthy dinner into the mix of Super Bowl snacks and Valentine Day sweets. Have I mentioned I am st...
-
How is it going? For me, it has been quite a busy day chatting up with my family and friends. Nevertheless I spun a very tasty, to...
-
 Evidently, according to Ceci Snyder of the National Pork Board , their slogan “the other white meat” is getting a little boring and “just...
-
 This is a great recipe by Tupperware that utilizes the Tupperware Oval Microwave Cooker. This recipe will make 6 servings. Rotisserie Chicke...
-
 I wanted to try instant oats idly for a long time. I used to make a version of this before,by adding a oats as major part in the rav...
-
The spicy curry cooking on the stove and a cloudy weather outside is just what I need on a lazy day like today. With this kind of weathe...


 Posts

