Showing posts with label KIDS CORNER. Show all posts
CHILLI PANEER (DRY)
in ACCOMPANIMENTS, KIDS CORNER, PANEER DISHES, SIDE DISH FOR CHAPATI, SNACKS on Thursday, November 29, 2012
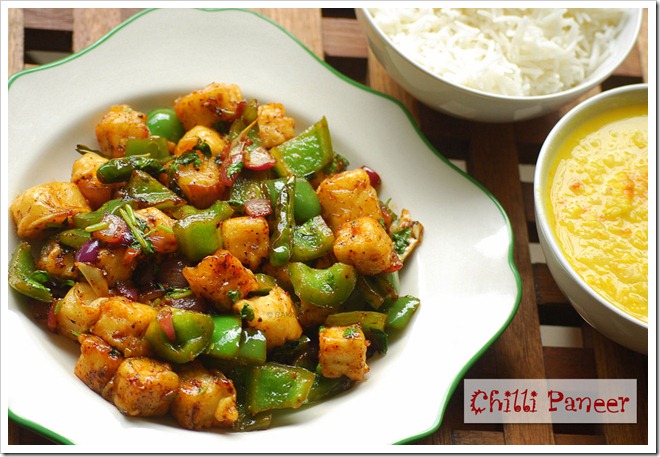
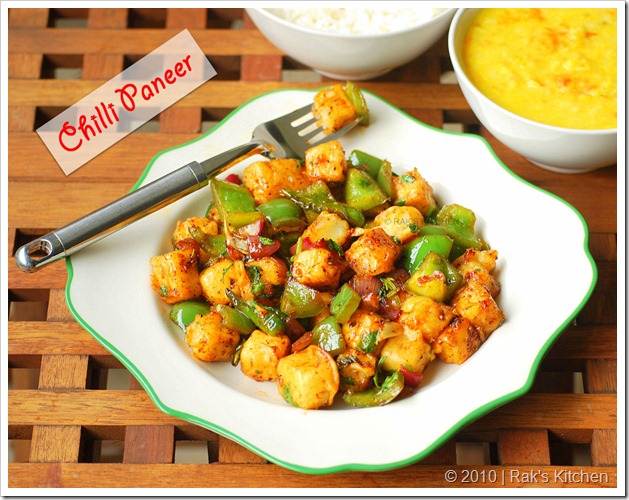
Few weeks back I realized I make only few repeated paneer dishes at home which we all got bored of


Ingredients:
| Paneer(cubed) | 200 gms / 1 & 1/2 cup |
| Capsicum | 1 no. |
| Onion | 1 no. |
| Green chilli | 4-5 nos. |
| Soy sauce | 1-2 tsp |
| Chilli sauce/tomato sauce | 1 tblsp |
| Lemon juice | 1 –2 tsp |
| Pepper powder(black) | 1/2 tsp |
| Garlic flakes | 5-6 nos. |
| Ajinomoto (optional) | 1/4 tsp |
| Chopped coriander | 4-5 tblsp |
| Salt | as needed(1/4-1/2 tsp) |
Batter for frying Paneer cubes:
| Maida/all purpose flour | 1 & 1/2 tblsp |
| Corn flour | 1 & 1/2 tblsp |
| Cooking soda | a small pinch |
| Salt | As needed (1/2 tsp) |
Oil for deep frying and frying
Method
- Make a thick batter of maida and corn flour with salt,the batter consistency should be enough to coat the paneer smoothly.
- Deep fry the paneer cubes by dipping them in this batter ,drain in paper towel.
- Cube the onion,capsicum,slit the green chillies and crush the garlic flakes roughly.
- Heat a wide pan with 2 tsp oil and add the crushed garlic,green chillies,give a fry.Add the onion and fry till transparent.
- And then add the capsicum. Give a stir in high flame.
- Reduce flame and add the sauces,pepper salt and mix well.
- Add the deep fried paneer cubes and mix in the lemon juice and mix well until everything blends evenly.
- Lastly add the coriander leaves and transfer to the serving dish.
- Enjoy hot!!
 |
 |
 |
 |
 |
 |
 |
 |

|
STUFFED BUNS / STUFFED MASALA BUNS
in BAKING, KIDS CORNER, SNACKS on Monday, October 29, 2012
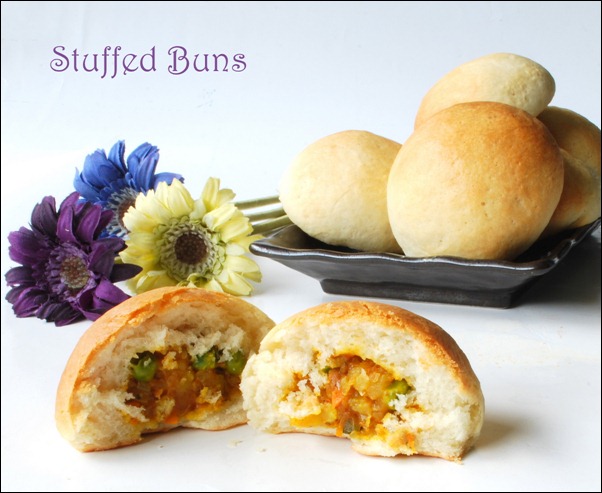
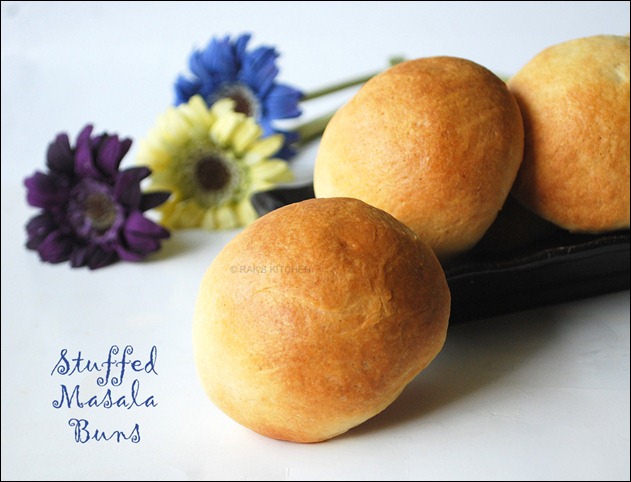
I had long time wish for trying out these stuffed buns/masala buns. When ever any of our blogger friends post stuffed buns, I always wish I could try it out and today is the day! I just followed the same recipe for the dough as my pizza dough…Stuffing also of our own choice/imagination.
INGREDIENTS
For the Dough
| Maida/All purpose flour | 1 & 1/2 cups |
| Milk | 1/4 cup |
| water | 1/4 cup(add if more needed) |
| Active dry yeast | 3/4 tblsp |
| sugar | 1 tblsp |
| Salt | 3/4 tsp |
| Olive oil | 3 tblsp |
For stuffing:
| Potato | 2 nos. (small) |
| carrot/beans/peas(together) | 1/2 cup |
| Onion | 1 no. |
| Jeera or ajwain/omam | 1 tsp |
| Garam masala powder | 1/4 tsp |
| Red chilli powder | 1/4 tsp |
| Turmeric powder | 1/8 tsp |
| Coriander leaves & lemon Juice | As needed |
| Oil | 1 tsp |
| Salt | As needed |
Method:
- Warm the milk,add sugar to it and mix well. Add the yeast to it and mix well. Keep aside.
- Take flour and make a dent,add water,olive oil,salt in it and the yeast completely dissolved in the milk.

- Mix and make a smooth dough,keep in a warm place covered with a cling wrap for an hour.
- Meanwhile prepare the stuffing. Cook the vegetables and heat a pan with oil,season with jeera/ajwain,add the onion and fry till transparent.
- Add the masala powder,red chilli powder,turmeric and salt and give it a quick stir.
- Add the cooked,mashed vegetables and fry till everything mixes well.
- Remove from fire and add the coriander leaves and lemon juice if desired,mix well.
- By now/after an hour, the dough we prepared would have doubled in size. Take it again and just give it a gentle knead and make six equal sized balls.
- Line a baking tray with aluminium foil,grease with olive oil and arrange the rolled balls with enough spacing between them. Brush with olive oil .
- Meanwhile roll the stuffing after cooling down completely.The stuffing should be around half the size as we roll the buns.
- After 10 minutes or so the rolled bun dough, would have raised again ( may be I can say little) .
- Take each bun and make a dent in the middle.
- Keep the rolled stuffing inside and pinch all the end towards centre to cover the stuffing.
- Roll in to smooth bun. Repeat for every bun. Arrange them in the lined baking tray. Keep the pinched joined side down.Brush them well with olive oil.
- Preheat the oven for 190°C. When the preheat is finished,by the time the buns would have raised too(refer the picture below).
- Bake for 17- 20 mins or until the top crust turns golden brown in colour. (Mine took exactly 19 mins) Smells heavenly!!
- After finished baking,brush them with butter or oil and enjoy with tea/evening snack! This would be a great snack for kids after they come back from school!


Notes:
|
Please refer to my fellow blogger’s stuffed buns too:
=> Lataji’s Healthy version of stuffed buns.
=>Another interesting stuffed masala buns from the blog Ruchika cooks.
EASY CHEESY PASTA
in BACHELOR COOKING, BREAKFAST/DINNER, KIDS CORNER, SNACKS on Saturday, September 22, 2012
This one is very easy to make,my hubby who doesn't likes pasta sauces, loves to eat pasta like this. I have used penne here,you can choose your pasta and try this. Any bachelor can try making this! Kids will sure love this too!!

Ingredients:(serves 1)
| Pasta of your choice | 3/4 cup |
| Butter | 1 tblsp |
| Cheese spread | 2 –3 tblsp |
| Pepper,crushed little coarsely | 1/2 tsp – 1 tsp |
| Olive oil/cooking oil | 1 tsp |
| Salt | as needed |
Method:
- Cook pasta with salt,cooking oil,till soft,as per the packing instructions. If you want the pasta to get cooked soon,soak in water for 1 hr and then cook.
- Drain the water and keep aside.
- Heat a broad pan and add the butter and just melt it in low flame.
- Add the cooked pasta and stir in the cheese and pepper.
- I used Amul Cheese spread with pepper in it,so I dint added pepper.
- Toss well till the cheese melts and blends well with the pasta.If you want bit juicy,you can add a tblsp of milk and mix.
- Serve hot!!


SWEET POTATO BUNS / ROLLS AND ANNOUNCING AN EVENT!!
in BAKING, BEGINNER BAKING, BREAKFAST/DINNER, KIDS CORNER on Wednesday, August 29, 2012

I had a lone sweet potato after making some other recipe and was thinking what to make with it. Then saw this Sweet Potato Buns recipe in a cookbook I took from the library (The Best Veggie Burgers On The Planet – by Joni Marie Newman). I was more than happy to try it out. And I always wanted to experiment buns with longer kneading time, as my previous attempts has no much kneading time.

I was just amazed with the result of this buns,they were smooth,soft outside and the pores were very fine and spongy inside. I was thrilled and could not wait to taste the buns as I saw them raising,with smooth top inside the oven while it was getting baked! And more than anything my hubby tasted and approved it was tasting good(he is not a big fan of yeasted breads/buns). My kid also had it happily after he returned from the School.
Ingredients
| Sweet potato | 1 small |
| Plain flour/All purpose flour/ Maida | 2 cups + 1/2 cup for sprinkling |
| Olive oil | 1/8 cup |
| Sugar | 1 tsp |
| Warm water | 1/4 cup |
| Milk | 1/2 cup |
| Salt | 3/4 tsp |
| Honey | 1 tsp |
| Active dry yeast | 3/4 tblsp |
| Butter | For brushing |
Method
|


Soft,slightly sweet buns are ready to enjoy! Have it for your breakfast or dinner with butter,jam with a cup of your favourite beverage!

Notes
|
CELEBRATE SWEETS|SEPTEMBER 2011-SWEETS/DESSERTS WITH FRUITS & VEGETABLES
I am so very excited to host an event in my space after years! When Nivedita contacted me if I could host her event for the month of September,without any second thought I accepted right away. Thanks to her for helping in choosing the theme and the opportunity to host the event as well! So lets CELEBRATE SWEETS the month September with Sweets/dessert recipes with fruits & Vegetables!!

So send in your innovative and interesting recipes to make this event a grand success!
Here are some guide lines for the event :
- Post any sweet/dessert recipes that uses any fruit or vegetable as a main ingredient in between Sep 1st – Sep 30th . Main ingredient means you should use that in the cooking process and not “garnish” with it!
- Link to the event details page of Nivedita’s blog and this post. Also include the event logo. These three things are mandatory.
- If you have any old post in your archive, either update the post with these links and logo or repost it as a new post with the links and logo.
- Send in your entry to tvijayanand1904(AT)gmail(DOT)com with “Celebrate Sweets” as subject,with (1) Your Name (2) Your Blog Name (3) Post link (4)A picture of the recipe.
- Multiple entries are allowed.
- Non bloggers are also welcome to submit their recipes, just email me the recipe with one of the picture of the recipe(clicked by yourself) that you made.
- I will take care of resizing the pictures so don”t worry about the size or dimensions.
- After your entry sent to my mail ID, if I don't acknowledge your mail within one or two days, please leave a comment in my recent post insisting it.
Here’s the LOGO for the event:

Popular entries
-
 The Tupperware Jel-Ring is an old classic and still today, it is very popular with my Tupperware customers. I must admit, its also one of my...
-
 I had soya chunks/nuggets in my hostel canteen,when I was studying in Trichy. We get mixed vegetable kurma with soya chunks in it. My f...
-
Only two days for the New Year to come,and at this point I am very happy to announce you that I am hosting an event for the ...
-
 Ahem. Please take note: I am throwing a healthy dinner into the mix of Super Bowl snacks and Valentine Day sweets. Have I mentioned I am st...
-
How is it going? For me, it has been quite a busy day chatting up with my family and friends. Nevertheless I spun a very tasty, to...
-
 Evidently, according to Ceci Snyder of the National Pork Board , their slogan “the other white meat” is getting a little boring and “just...
-
 This is a great recipe by Tupperware that utilizes the Tupperware Oval Microwave Cooker. This recipe will make 6 servings. Rotisserie Chicke...
-
 I wanted to try instant oats idly for a long time. I used to make a version of this before,by adding a oats as major part in the rav...
-
The spicy curry cooking on the stove and a cloudy weather outside is just what I need on a lazy day like today. With this kind of weathe...


 Posts

